

I used to spend a lot each morning on a latte on the way into work. The coffee itself was fine, but what I was really paying for was that thick, velvety foam on top. Turns out I did not need a commercial steamer or a high-end espresso machine to get it. I needed a cheap handheld frother and about three minutes of my time. Once I figured out the right technique, the homemade version got better than most of what the shop made.
The problem most people have is not the frother itself. It is that they skip the temperature step, use the wrong amount of milk, or hold the wand in the wrong spot. This guide walks through the full process for lattes, cappuccinos, and matcha drinks so you get real foam instead of big bubbles that disappear in thirty seconds.
Your coffee habit costs a fortune monthly. This costs once.
The Zulay Kitchen handheld frother has 4.4 stars across more than 237,000 reviews. It ships with Duracell batteries already installed, which is one less excuse for it to sit in a drawer.
Amazon Check Today's Price on Amazon →Step 1: Choose Your Milk and Measure the Right Amount
Whole milk froths the easiest because of its fat content, and it gives you the creamiest, heaviest foam. If you are dairy-free, oat milk is the next best option, barista-style oat milk specifically, since regular oat milk has less protein and tends to produce a flat, watery result. Skim milk creates the stiffest foam but tastes thin in a latte. Almond milk is the hardest to work with; it can froth but the foam collapses fast, so use it immediately.
For a standard latte in a 12-ounce mug, use about six ounces of milk. For a smaller cappuccino-style drink, use four ounces. If you overfill, the foam has nowhere to grow and you end up just spinning warm milk. Fill your frothing container no more than halfway before you start.
The container matters more than people realize. A small stainless steel pitcher or a straight-sided mason jar works better than a wide bowl. The narrow walls let the whirlpool build, which is what creates uniform foam rather than a few big bubbles on top.
Step 2: Heat the Milk to the Right Temperature
This is the step that most people get wrong, and it is why their foam turns out wrong. Cold milk can froth, but it produces stiff foam that sits on top like a layer of meringue rather than mixing into the drink. Hot milk froths fast but loses structure quickly if you overheat it. The sweet spot is between 140 and 155 degrees Fahrenheit.
If you do not have a thermometer, here is a practical test: heat the milk in the microwave for about 45 to 60 seconds for a six-ounce portion, then hold the container. If the outside is too hot to hold comfortably for more than two seconds, the milk is right. If you can hold it easily, give it another 15 seconds. You are looking for that just-past-comfortable warmth.
On the stovetop, heat over medium-low and watch for small bubbles to form along the edges of the pot. Pull it off before it boils. Scalded milk tastes flat and does not froth as well.
Step 3: Froth the Milk with the Zulay Kitchen Wand
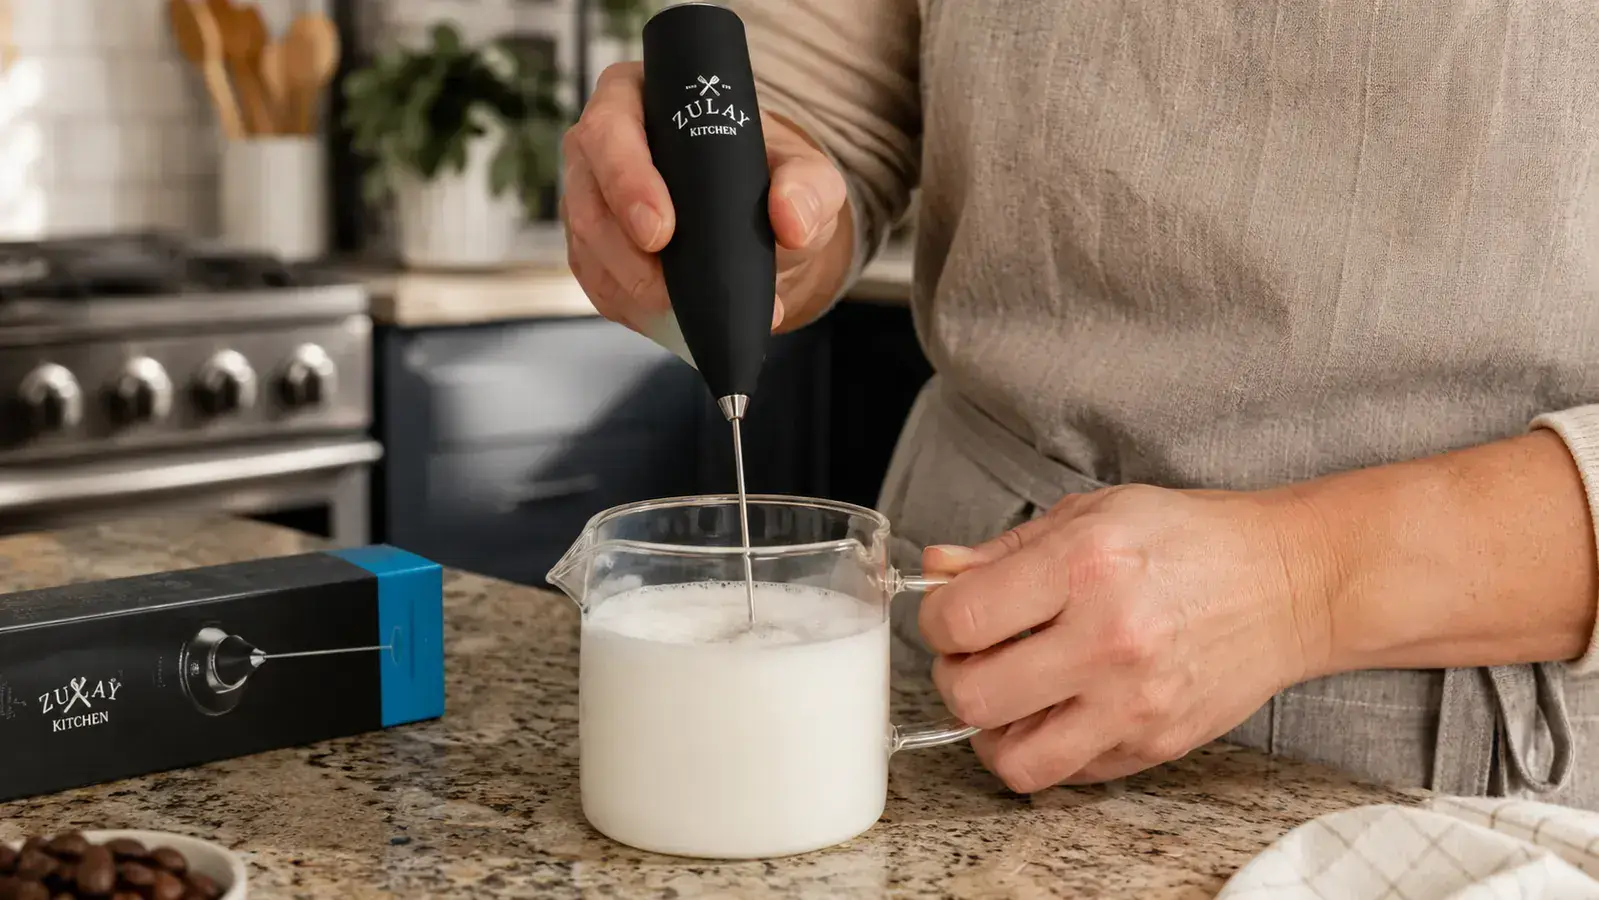
Submerge the frother head just below the surface of the milk, about a half-inch down. Turn it on before you put it in the milk, not after, or you will splash. Hold the container at a slight angle with your non-frother hand to encourage a swirling motion.
Keep the wand near the surface for the first 15 to 20 seconds. This is where the foam builds. Then slowly lower it toward the bottom of the container for the last 10 seconds to work the foam back into the milk and get a uniform texture throughout. Total frothing time is about 25 to 30 seconds for most drinks. The Zulay Kitchen's Z1 motor is strong enough that you do not have to press hard or move it around a lot. Let the spin do the work.
If you end up with large bubbles on top, give the container a few taps on the counter and then swirl it gently in a circle for five seconds. This pops the big surface bubbles and settles the foam into a smoother layer. It is the same technique baristas use before pouring.

Step 4: Pull Your Espresso or Brew Strong Coffee
A real latte is built on espresso, but you do not need an espresso machine. Strong brewed coffee made in a Moka pot gives you a close result at a fraction of the cost. French press coffee brewed with a higher coffee-to-water ratio (roughly one tablespoon per two ounces of water) also works well. The goal is a concentrated, bold base that the milk foam can stand against without getting washed out.
If you have a Nespresso or Keurig with an espresso pod option, use it. The point is to have your base ready before you froth because the foam starts losing structure the moment you stop the wand. Pour the coffee first, then froth, then pour the foam over. Never the other way around.
Step 5: Assemble the Drink and Adjust for Latte vs Cappuccino vs Matcha
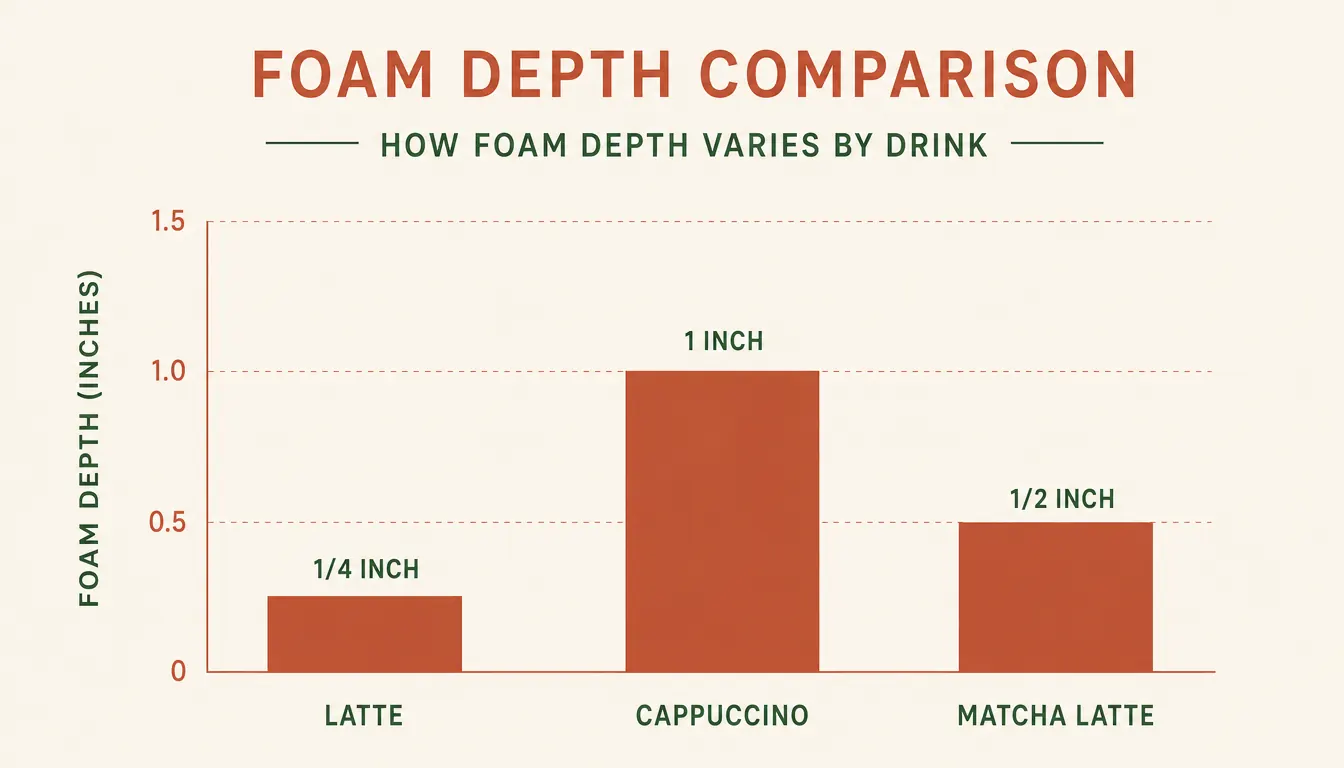
For a latte, pour your espresso or strong coffee into the mug, then slowly pour the frothed milk in with a spoon held at the lip of the container to hold back the foam. Once most of the steamed milk is in, spoon the remaining foam on top. You want roughly a quarter-inch of foam for a latte. It should sit flat across the top, not piled high.
For a cappuccino, you want more foam, closer to a full inch. Froth a smaller amount of milk (three to four ounces) and let it build longer before pouring. The coffee-to-milk ratio shifts too: equal parts espresso, steamed milk, and foam. It is a richer, stronger drink.
For a matcha latte, skip the espresso entirely. Whisk a teaspoon of ceremonial-grade matcha powder into two ounces of hot water first until it is smooth and free of clumps. Pour that into your mug, then add your frothed oat or whole milk on top. The Zulay wand works fine directly in the matcha-water mixture too if you want to aerate it before adding milk. Some people prefer a thicker foam layer on matcha drinks, so froth a little longer at the surface.
What Else Helps
A few extras will sharpen your results without adding much cost or complexity. A simple digital thermometer that clips onto your frothing container removes the guesswork on milk temperature and is worth having if you make coffee at home every day. A dedicated frothing pitcher, even an inexpensive one, gives you better control during pouring than a mason jar.
Cleaning the Zulay wand takes about ten seconds: run it briefly in a small cup of warm water right after use, then wipe the head with a dry cloth. If you let milk dry on the whisk head, it gets harder to clean and can affect motor balance over time. The batteries that come included are standard AA Duracells, and they will last weeks of daily use before you need to swap them.
If you want flavored lattes, add your syrup directly to the coffee base before pouring the milk, not after. Vanilla, caramel, or hazelnut syrups mix more evenly when they hit the warm coffee first rather than sitting under a layer of cold foam. A tablespoon of syrup for a 12-ounce drink is a reasonable starting point.
Cold foam drinks are possible with this wand too. Use cold milk straight from the refrigerator and froth at the surface for about 20 to 25 seconds. The foam will be stiffer and lighter. Spoon it over iced coffee for a cold foam cold brew, which is one of the more popular drinks at coffee shops right now. The Zulay handles cold milk without any issues; the motor is strong enough to work through the thicker consistency.
Once I learned the temperature step, my home lattes got better than most of what the coffee shop made. The wand itself costs less than two trips to the drive-through.
One thing worth knowing: the Zulay frother makes a consistent foam, not a barista-pour-art foam. If your goal is to draw a leaf or a heart in the foam, you need a steamer wand on an espresso machine and a lot of practice. If your goal is a great-tasting, properly textured latte before work without leaving the house, this wand does that job well and does it every morning.
The two articles linked below go deeper on how this frother holds up over a full year of use and why a handheld wand beats bulkier electric frothing machines for most home kitchens. If you are trying to decide whether the Zulay is worth keeping on your counter, those are good reads. But if you already know you want to start making lattes at home, the five steps above are all you need to get going today.
Ready to stop overpaying for foam? The Zulay frother is the tool that makes this whole guide work.
More than 237,000 Amazon reviews with a 4.4-star average. Ships with batteries included. Budget-friendly at today's price.
Amazon Check Today's Price on Amazon →